How to Strip Old Wallpaper: Step-by-Step Guide for a Smooth Wall Finish
Removing old wallpaper may seem straightforward, but achieving a clean, smooth wall finish requires the right approach. Many Sydney homes, especially older properties, have multiple wallpaper layers, strong adhesives, and underlying plaster that can be easily damaged if not handled correctly. Rushing the process often leads to uneven surfaces, peeling paint, or costly repairs later.
Proper wallpaper removal is the foundation of any successful interior update, whether you are repainting or installing new wallpaper. It ensures that the surface is clean, stable, and ready for the next finish. When done correctly, it improves durability, enhances appearance, and prevents long-term issues.
This article walks you through a practical, step-by-step method to strip old wallpaper in Sydney homes, helping you achieve professional-level results with a structured and reliable process.
Why Proper Wallpaper Removal Matters in Sydney Homes
Sydney homes often present unique challenges when it comes to wallpaper removal. Humidity can weaken adhesives unevenly, while older homes may have wallpaper applied over multiple previous layers. These factors make careful removal essential rather than optional.
Poor removal techniques can damage plaster walls, leaving gouges and rough patches that require extensive repairs. Adhesive residue left behind can also interfere with paint or new wallpaper, causing bubbling, peeling, or poor adhesion over time.
A properly stripped wall ensures a smooth, stable surface that allows finishes to last longer and look better. It also reduces the risk of future maintenance issues, making the effort worthwhile.
Tools and Materials Needed to Strip Old Wallpaper
Preparation plays a critical role in achieving a clean result. Using the correct tools and materials ensures efficiency and minimises the risk of wall damage.
- Wallpaper scoring tool (perforator) for creating small holes
- Flat scraper (wide blade and smaller knife for edges)
- Spray bottle or garden sprayer for applying the solution
- Drop sheets to protect the flooring and surrounding areas
- Sandpaper (coarse and fine grit) for smoothing surfaces
- Wallpaper removal solution or a warm water mixture
- Mould treatment solution, if required
- Wall filler for repairing imperfections
- Primer or
sealer for final surface preparation
Step-by-Step Guide to Stripping Old Wallpaper in Sydney
Step 1: Prepare the Room Properly
Start by removing or covering furniture and protecting the floor with drop sheets. Wallpaper removal involves moisture, so it is important to prevent water damage to the surrounding areas. Turn off power near outlets if working close to electrical points and ensure the space is safe and accessible.
Step 2: Score the Wallpaper Surface
Use a wallpaper scoring tool to create small perforations across the surface. This allows the removal solution to penetrate through the wallpaper and reach the adhesive underneath. Apply light pressure to avoid damaging the plaster wall beneath.
Step 3: Apply Wallpaper Removal Solution
Soak the wallpaper using warm water or a specialised remover solution. Work in small sections to ensure the surface remains wet long enough for the adhesive to soften. Allow the solution to sit for several minutes so it can break down the glue effectively.
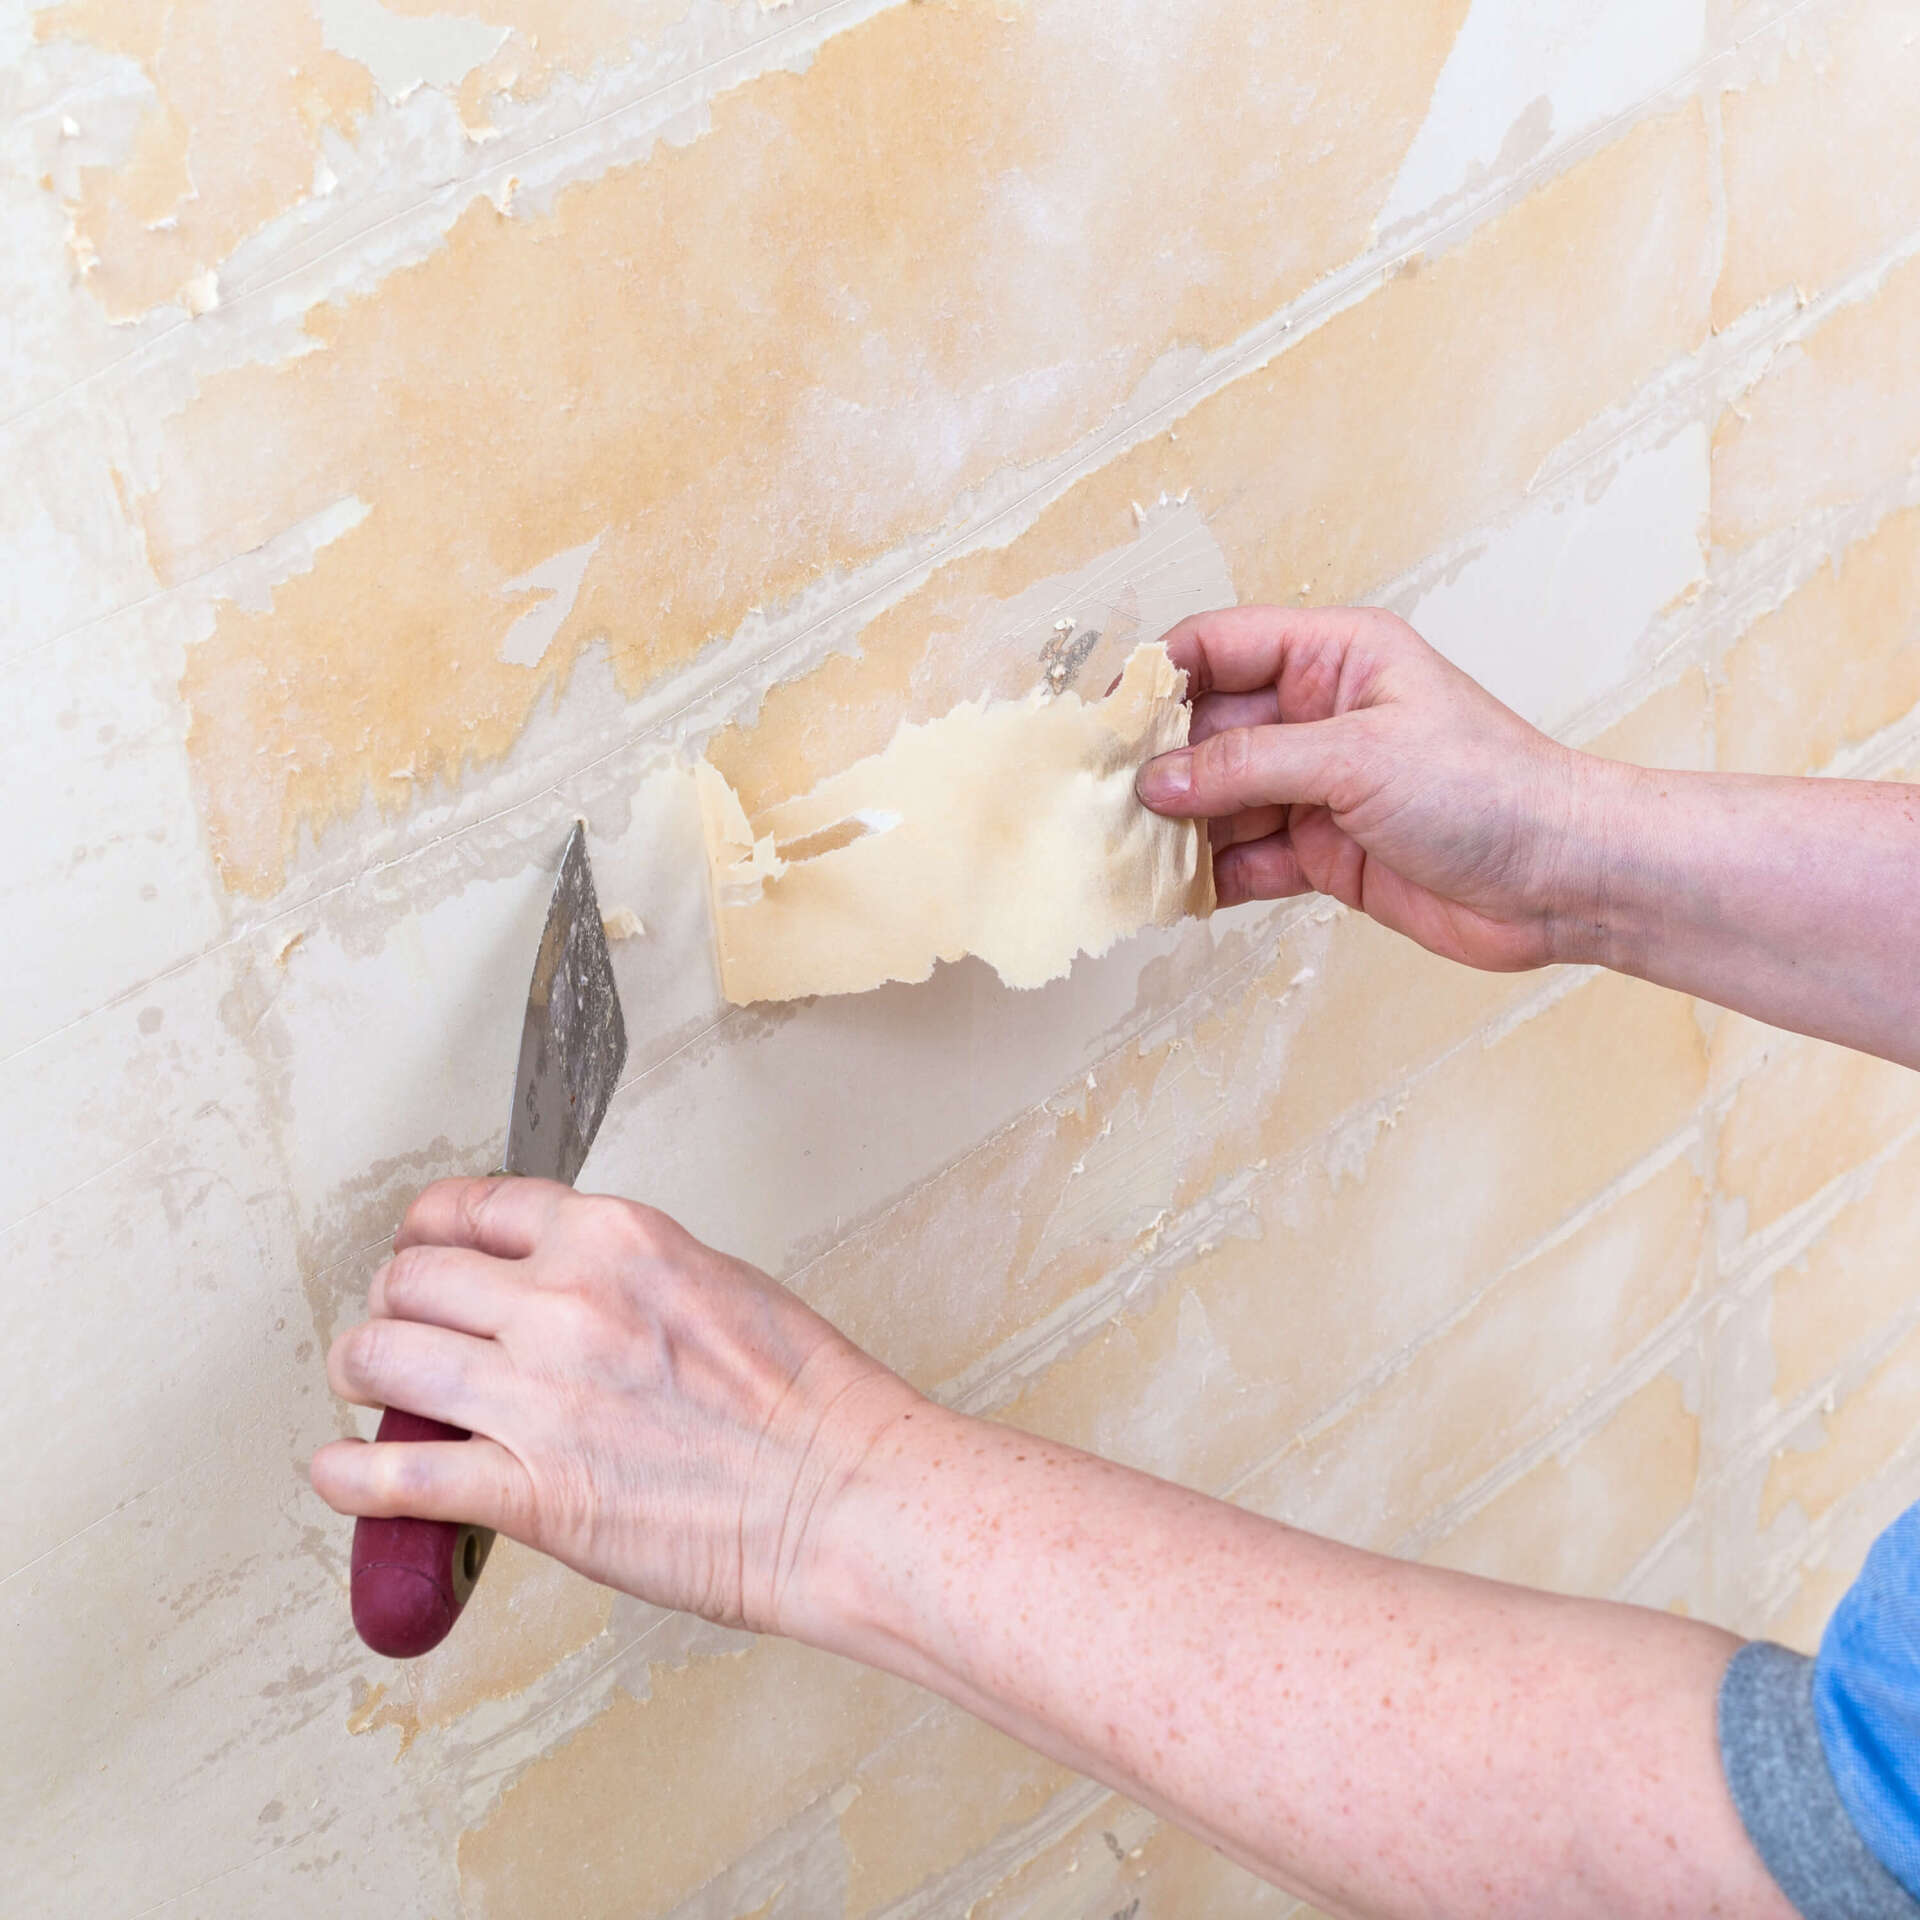
Step 4: Remove the Wallpaper Carefully
Once the wallpaper is fully soaked, begin scraping it off using a flat blade. Start from seams or edges where the paper lifts more easily. Work steadily and avoid forcing the scraper, as this can damage the wall surface.
Step 5: Clean Off Adhesive Residue
After removing the wallpaper, there will often be leftover glue on the wall. This must be cleaned thoroughly using warm water or a mild cleaning solution. Leaving adhesive behind can cause problems with future finishes, so take the time to ensure the surface is completely clean.
Step 6: Repair and Smooth the Wall Surface
Inspect the wall for cracks, dents, or damage caused during removal. Apply wall filler where needed and allow it to dry fully. Once dry, sand the surface to create a smooth and even finish.
Step 7: Seal and Prepare for Finishing
Apply a primer or sealer to stabilise the wall surface and prevent stains from bleeding through. This step is essential before painting or installing new wallpaper, as it ensures proper adhesion and a professional finish.
Common Challenges When Removing Wallpaper in Sydney Homes
Wallpaper removal can vary depending on the condition of the wall and the type of adhesive used. Some challenges are more common in Sydney properties.
Multiple wallpaper layers are often found in older homes, making removal more time-consuming. Each layer needs to be softened and removed carefully to avoid damaging the wall underneath.
Strong adhesives can also make the process more difficult. Some older glues resist water and require repeated soaking or specialised solutions to break down effectively.
Wall damage is another common issue, especially when scraping too aggressively. This highlights the importance of working patiently and repairing the surface properly after removal.
Alternative Methods for Wallpaper Removal
For more difficult projects, alternative methods can improve efficiency and results. Steam wallpaper removal uses heat to loosen adhesive, making it easier to strip large sections quickly. This method is particularly useful for stubborn wallpaper or multiple layers.
Chemical removal solutions are another option, designed to dissolve the adhesive more effectively than water alone. These products should be used carefully and in well-ventilated areas. Both methods can save time, but still require careful handling to protect the wall surface.
Preparing Walls After Wallpaper Removal
Once the wallpaper is removed, proper preparation is essential before applying any new finish. This stage determines the final quality of the wall.
Ensure all adhesive residue is completely removed, as even small amounts can affect paint or wallpaper adhesion. Sand the entire surface lightly to create a consistent texture, then clean away dust before applying primer. A well-prepared wall results in a smoother, more durable finish that enhances the overall look of the space.
When to Hire a Professional Wallpaper Removal in Sydney
While DIY wallpaper removal is manageable for smaller areas, some projects require professional expertise. Large walls, multiple layers, or delicate plaster surfaces can make the process more complex and time-consuming.
Professionals have the right tools, experience, and techniques to remove wallpaper efficiently without damaging the wall. They also ensure the surface is properly prepared for painting or reinstallation, saving time and reducing the risk of costly mistakes.
Final Thoughts
Stripping old wallpaper in Sydney homes requires more than just removing the visible surface. It involves careful preparation, the right tools, and a structured process to achieve a smooth, professional finish. Each step, from scoring and soaking to scraping and repairing, plays a critical role in ensuring the wall is ready for its next stage.
While DIY methods can deliver good results when done correctly, more complex jobs benefit from expert handling. For homeowners looking for reliable and high-quality results, at SYD Wallpaper, we offer professional wallpaper removal and installation services tailored to Sydney homes. With a focus on precision, clean finishes, and excellent customer service, their team ensures your walls are perfectly prepared for a flawless transformation.
You might also like
SYD Wallpapering Blog